> ## Documentation Index
> Fetch the complete documentation index at: https://ampersand-24eb5c1a-cobalt0s-google-contacts.mintlify.site/llms.txt
> Use this file to discover all available pages before exploring further.
# Google
The Google connector supports Google products which have APIs with the root URL `googleapis.com`, these include:
* Calendar
* Gmail
* Contacts
* Google Drive
## What's supported
### Supported actions
This connector supports:
* [Proxy Actions](/proxy-actions), using the base URL `https://www.googleapis.com`.
The **Calendar** module supports:
* [Read Actions](/read-actions), including historical backfill. Please note that incremental
read **is only supported for the Calendar `Events` object**; otherwise, a full read of the Google instance will be performed for each scheduled run.
* [Write Actions](/write-actions).
> **Important Note on Events Backfill**: The `events` object has a 28-day cap for historic backfill and does not support full history, due to limitations in the Google API. When syncing events data, ensure your backfill period does not exceed 28 days.
The **Gmail** module supports:
* [Read Actions](/read-actions), including historical backfill. Please note that incremental read and pagination
**are only supported for `Drafts`, `Messages`, and `Threads` objects**; otherwise, a full read of the Gmail instance will be performed for each scheduled run.
* [Write Actions](/write-actions).
The **Contacts** module supports:
* [Read Actions](/read-actions), including historical backfill. Please note that incremental read is not supported, a full read of the Google Contacts will be done for each scheduled read.
* [Write Actions](/write-actions).
### Supported Calendar objects
The Google connector supports reading from and writing to the following **Calendar** module objects:
* [acl](https://developers.google.com/workspace/calendar/api/v3/reference/acl)
* [calendarList](https://developers.google.com/calendar/api/v3/reference/calendarList#resource-representations)
* [events](https://developers.google.com/workspace/calendar/api/v3/reference/events)
The Google connector supports the following read-only objects:
* [settings](https://developers.google.com/workspace/calendar/api/v3/reference/settings)
### Supported Gmail objects
The Google connector supports reading from and writing to the following **Gmail** module objects:
* [delegates](https://developers.google.com/workspace/gmail/api/reference/rest/v1/users.settings.delegates/list)
* [drafts](https://developers.google.com/workspace/gmail/api/reference/rest/v1/users.drafts/list)
* [filters](https://developers.google.com/workspace/gmail/api/reference/rest/v1/users.settings.filters/list)
* [forwardingAddresses](https://developers.google.com/workspace/gmail/api/reference/rest/v1/users.settings.forwardingAddresses/list)
* [identities](https://developers.google.com/workspace/gmail/api/reference/rest/v1/users.settings.cse.identities/list)
* [keypairs](https://developers.google.com/workspace/gmail/api/reference/rest/v1/users.settings.cse.keypairs/list)
* [labels](https://developers.google.com/workspace/gmail/api/reference/rest/v1/users.labels/list)
* [sendAs](https://developers.google.com/workspace/gmail/api/reference/rest/v1/users.settings.sendAs/list)
The Google connector supports the following read-only objects:
* [messages](https://developers.google.com/workspace/gmail/api/reference/rest/v1/users.messages#Message)
* [threads](https://developers.google.com/workspace/gmail/api/reference/rest/v1/users.threads/list)
### Supported Contacts objects
The Google connector supports reading from and writing to the following **Contacts** module objects:
* [contactGroups](https://developers.google.com/people/api/rest/v1/contactGroups)
* [myConnections](https://developers.google.com/people/api/rest/v1/people.connections)
* [peopleDirectory](https://developers.google.com/people/api/rest/v1/people)
The Google connector supports the following read-only objects:
* [otherContacts](https://developers.google.com/people/api/rest/v1/otherContacts)
### Example integration
Example manifest files can be found in our samples repository on GitHub:
* [Google Calendar example](https://github.com/amp-labs/samples/blob/main/google-calendar/amp.yaml)
* [Gmail example](https://github.com/amp-labs/samples/blob/main/google-gmail/amp.yaml)
* [Google Contacts example](https://github.com/amp-labs/samples/blob/main/google-contacts/amp.yaml)
## Before you get started
To integrate Google with Ampersand, you will need a [Google Cloud account](https://cloud.google.com/).
Once your account is created, you'll need to create a Google app, configure the Ampersand redirect URI within the app, and obtain the following credentials from your app:
* Client ID
* Client Secret
* Scopes
You will then use these credentials to connect your application to Ampersand.
### Create a Google Cloud account
You can sign up for a [free Google Cloud account here](https://cloud.google.com/free).
### Enable the appropriate APIs
Go to the [API Library page](https://console.cloud.google.com/apis/library) of Google Cloud Console and search for the APIs your integration will need. For example, if you are building a Google Drive integration, type "Google Drive", select the right API and click the "Enable" button.
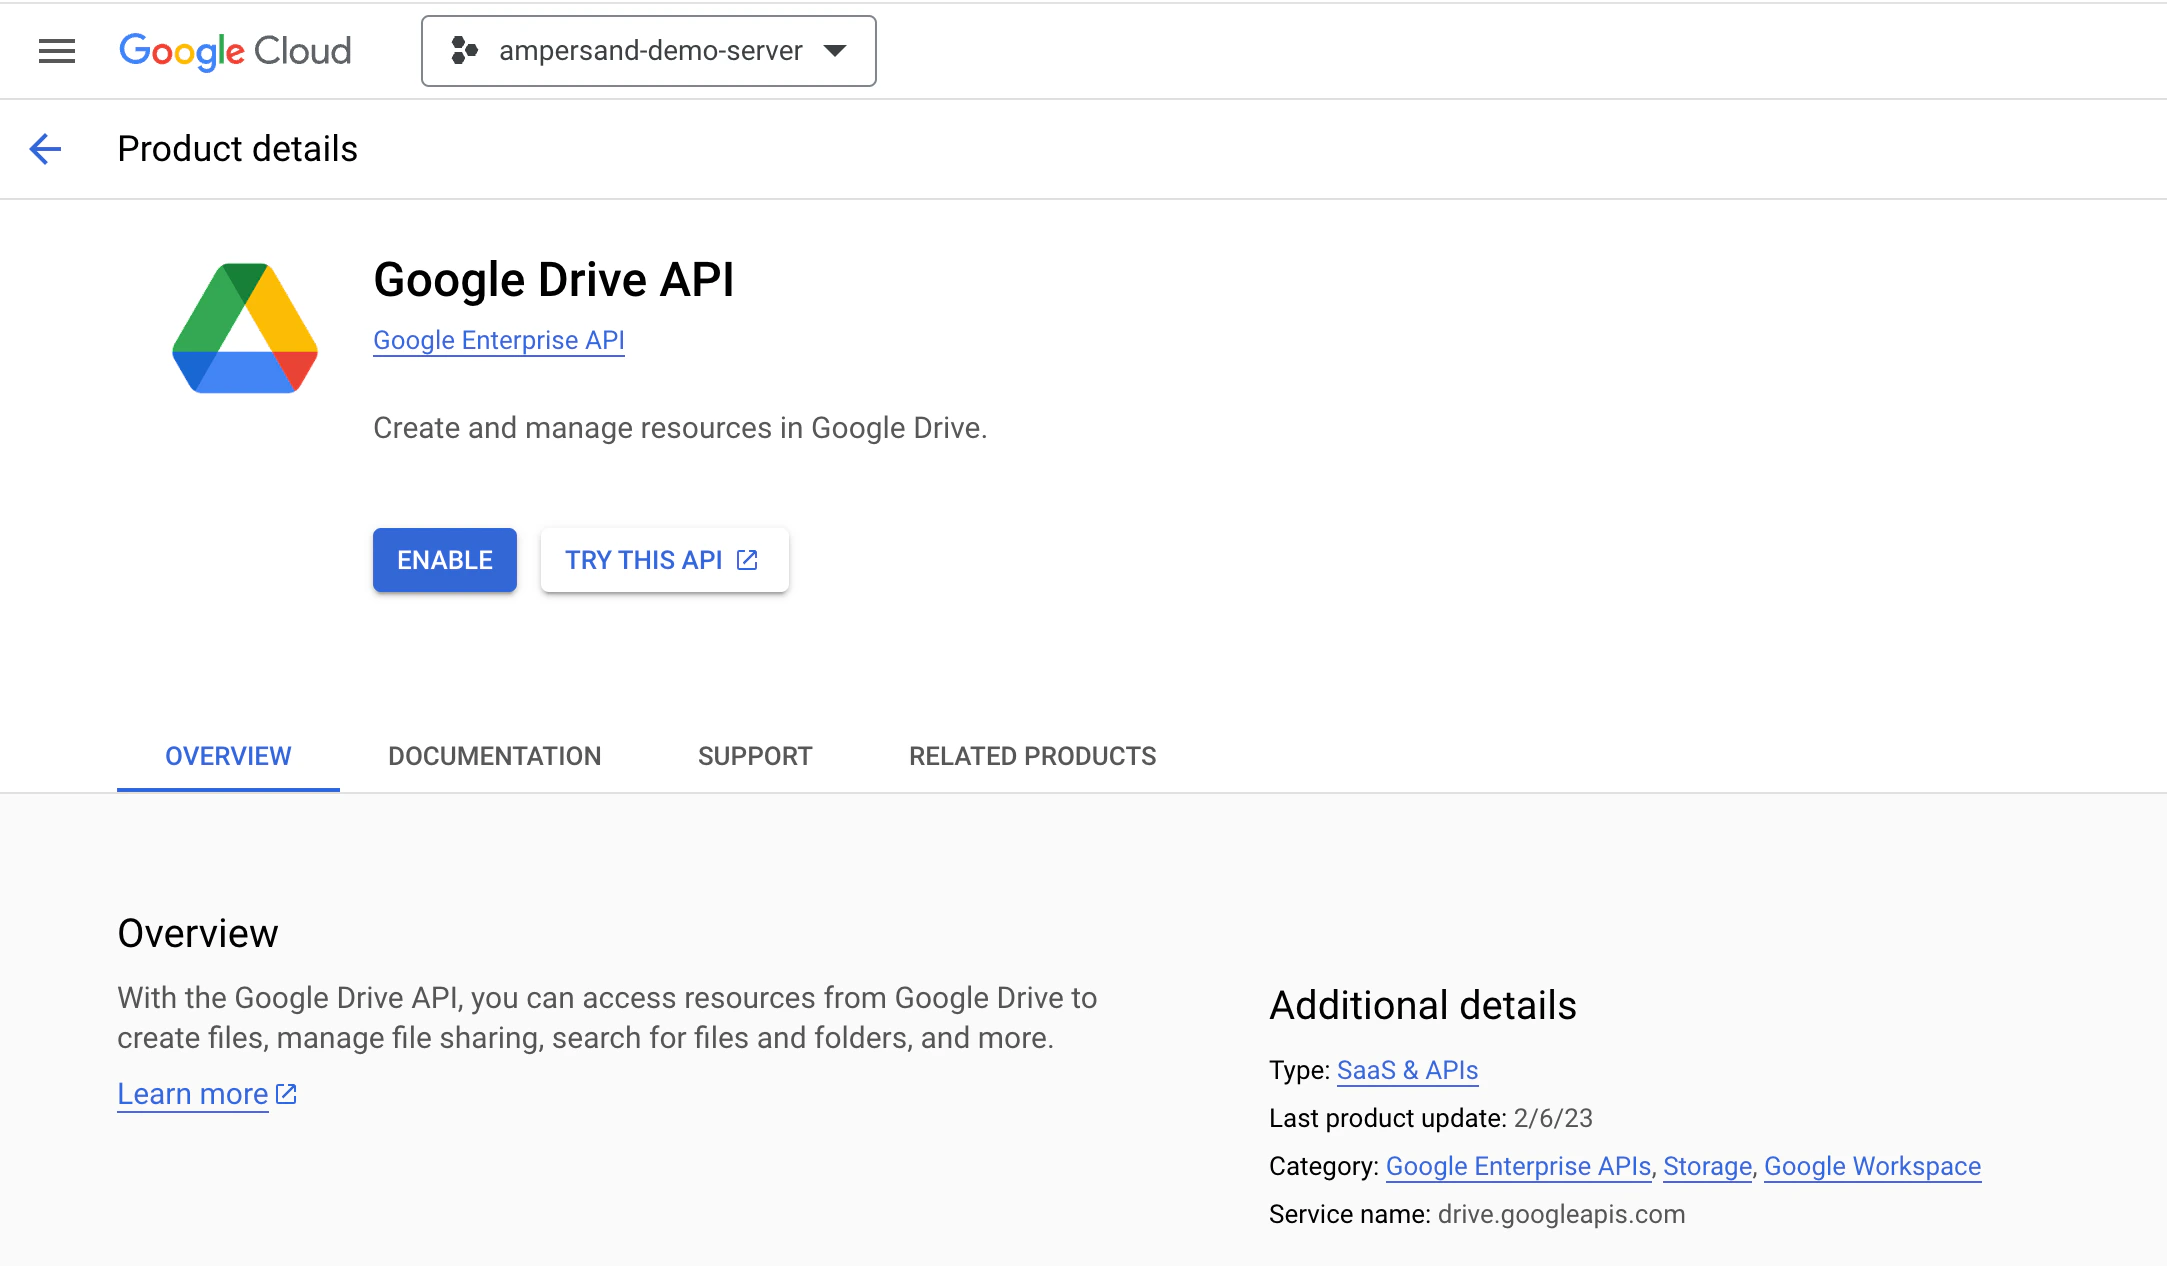 Repeat this process for all the APIs your integration will need.
### Creating a Google App
Follow the steps below to create a Google App:
1. Go to the [OAuth consent screen](https://console.cloud.google.com/apis/credentials/consent) page, pick "External" as the User Type.
Repeat this process for all the APIs your integration will need.
### Creating a Google App
Follow the steps below to create a Google App:
1. Go to the [OAuth consent screen](https://console.cloud.google.com/apis/credentials/consent) page, pick "External" as the User Type.
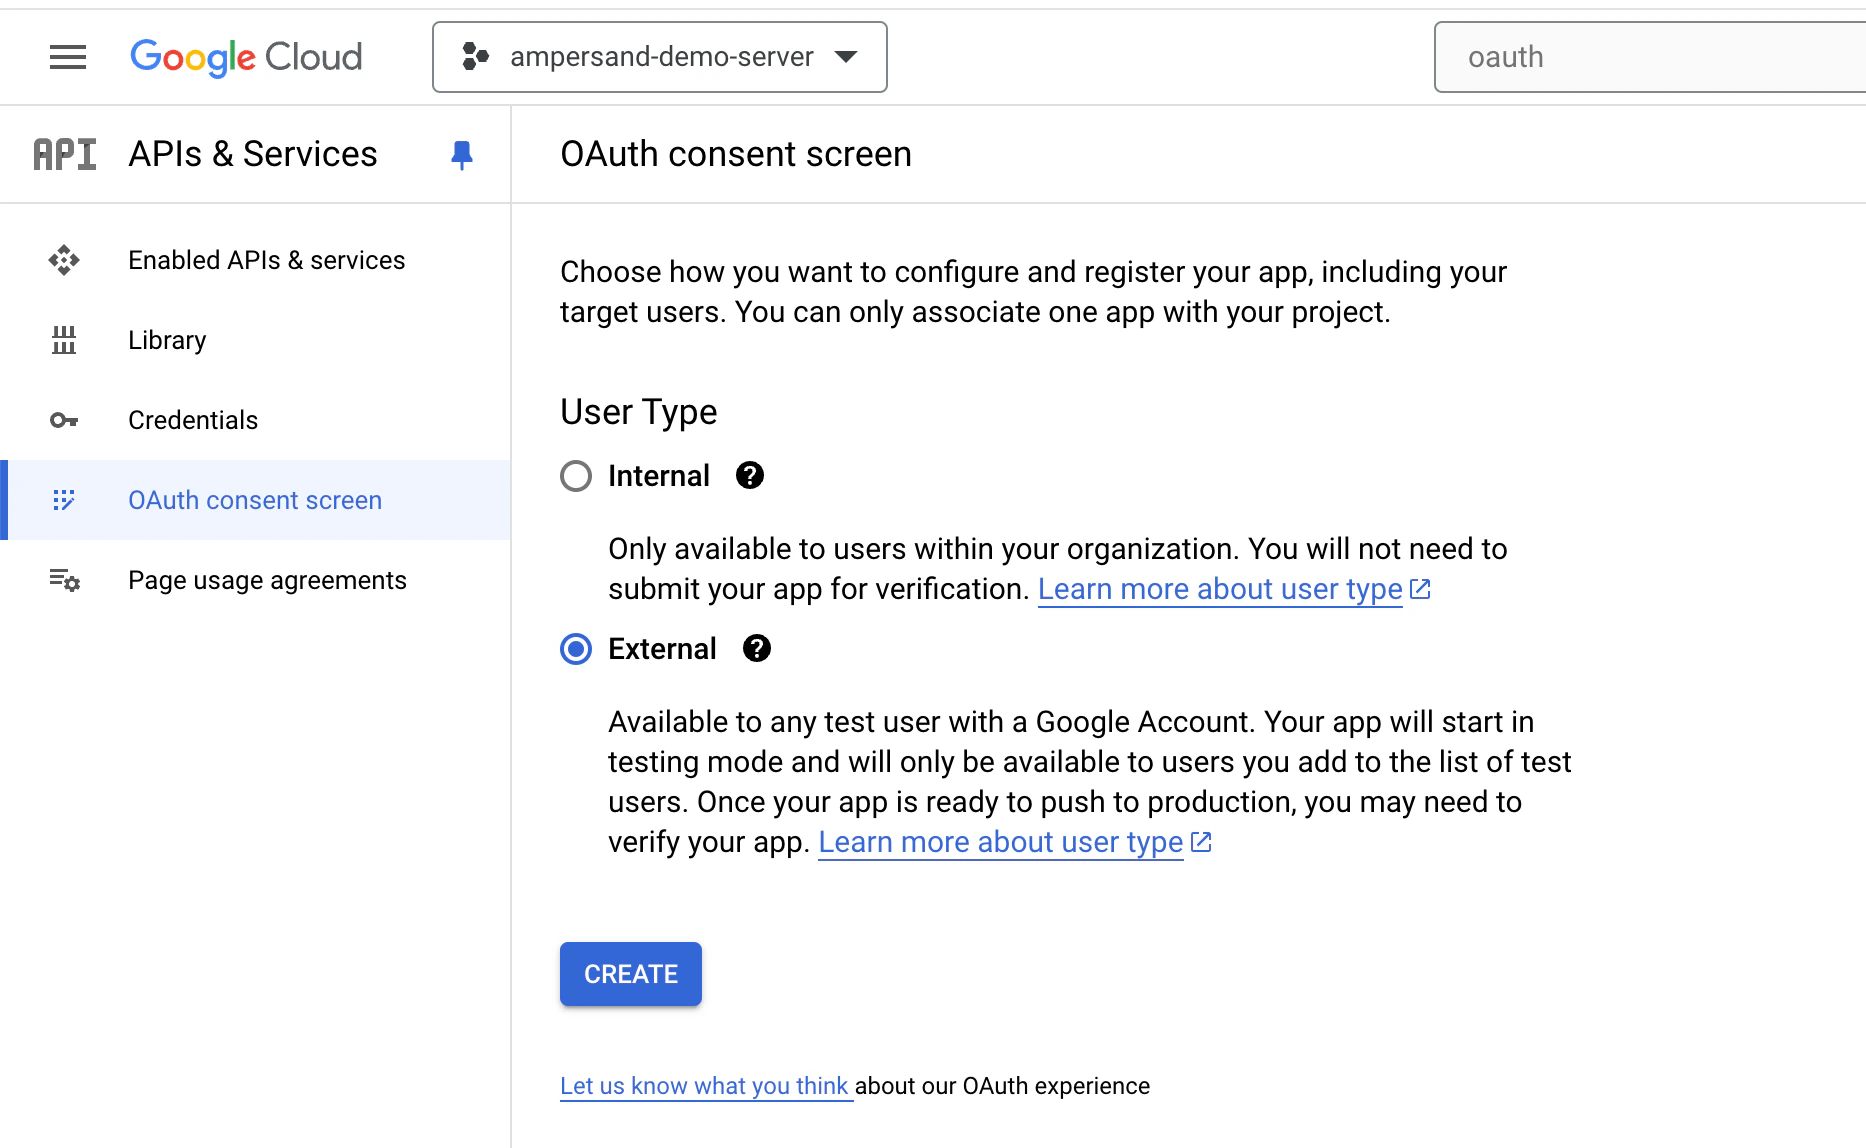
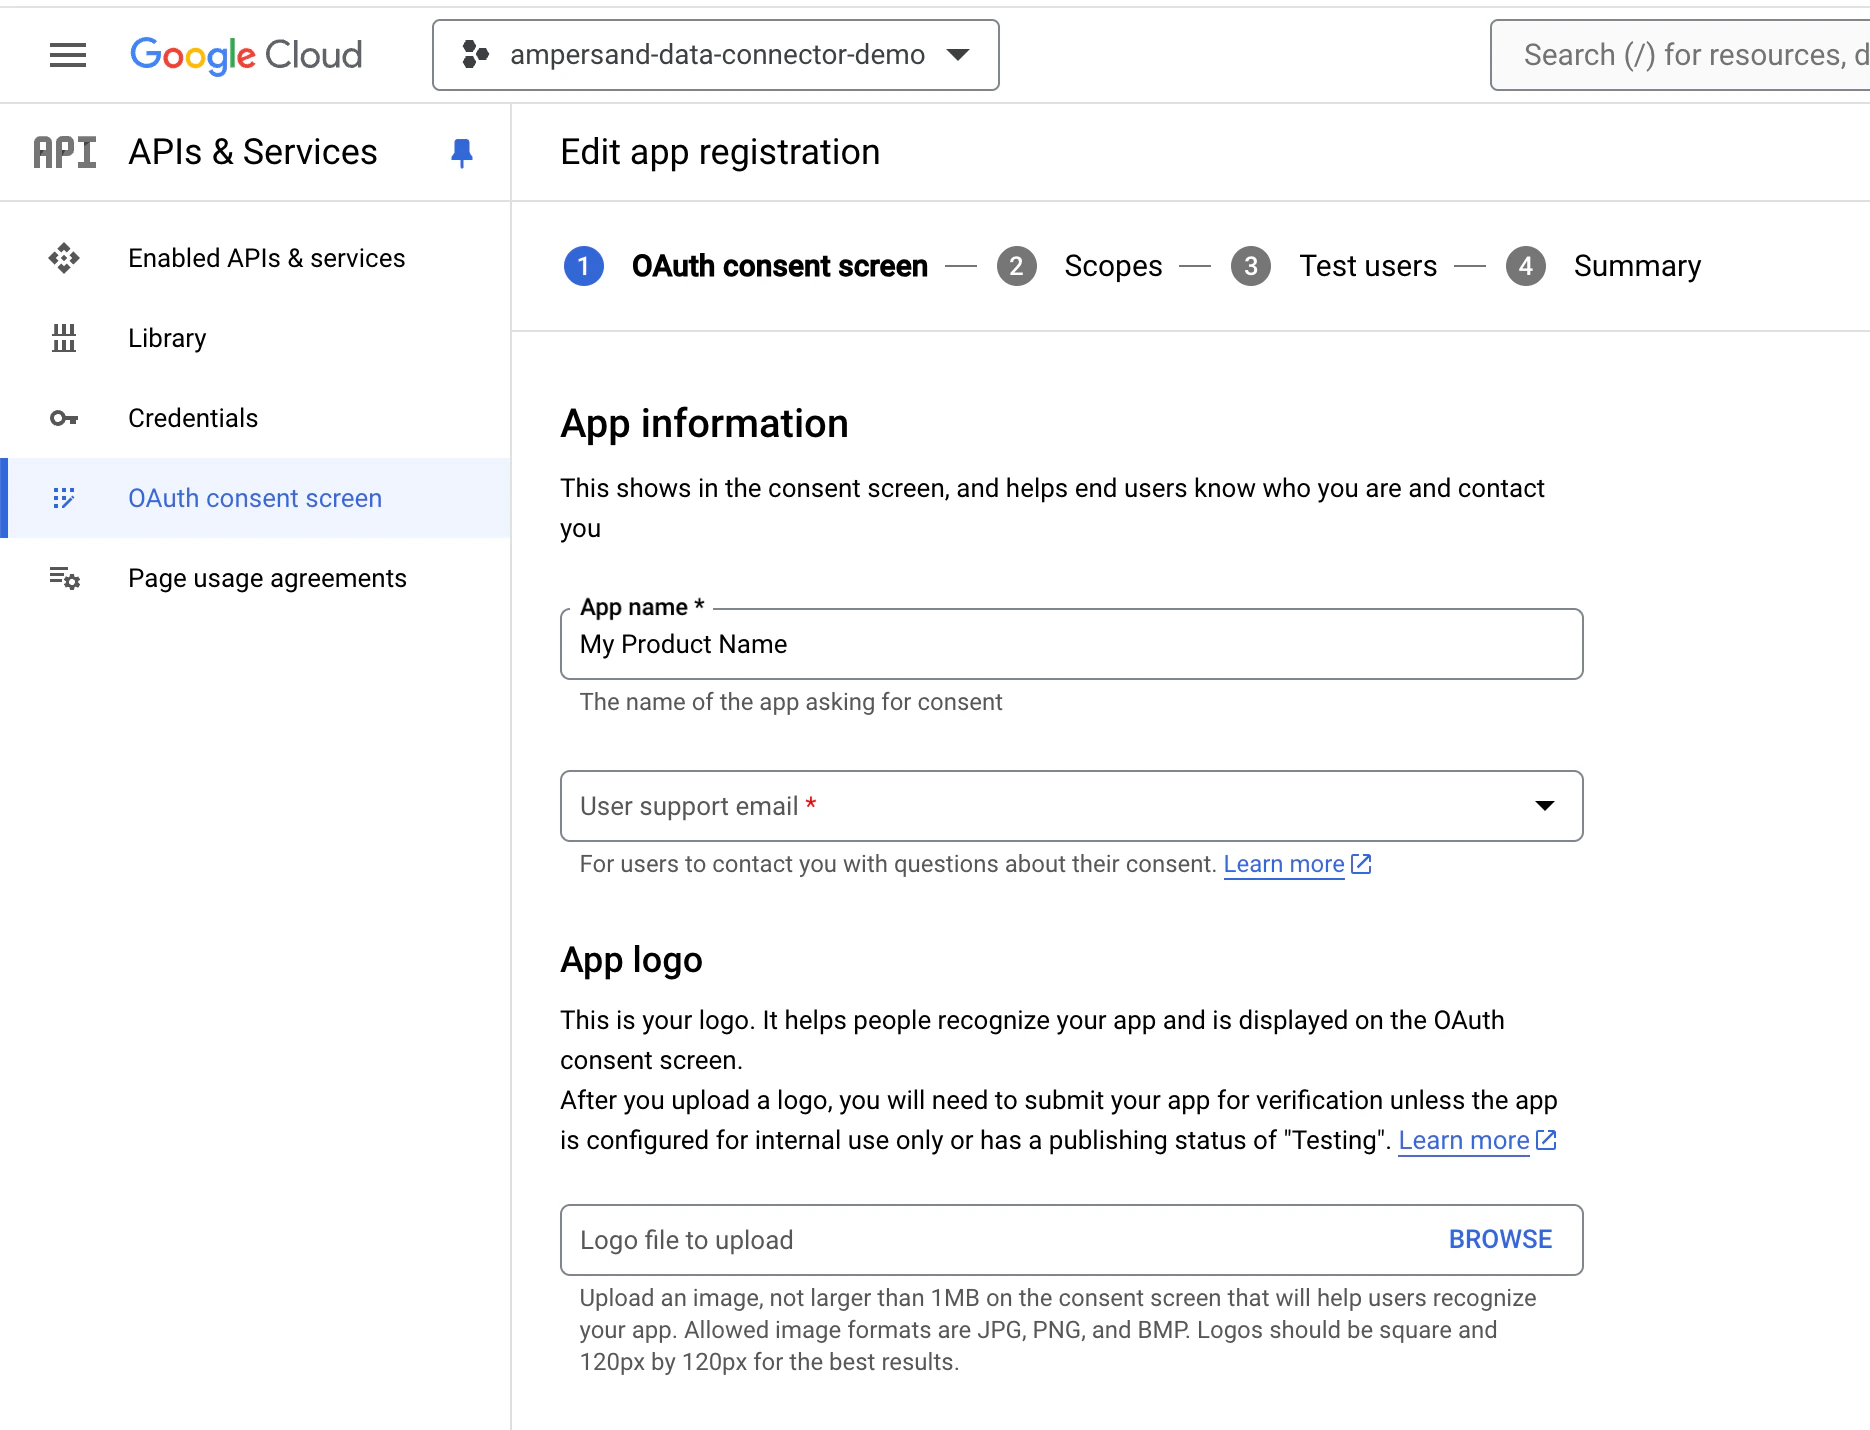
2. Enter the information required on the next page, click "Save and Continue".
**Important information about App Logo**: when you are creating a Google app for development purposes, do not upload a logo. Uploading a logo will trigger an app verification process. When you are ready to submit your app for review by Google, then you can come back to this page and upload a logo.
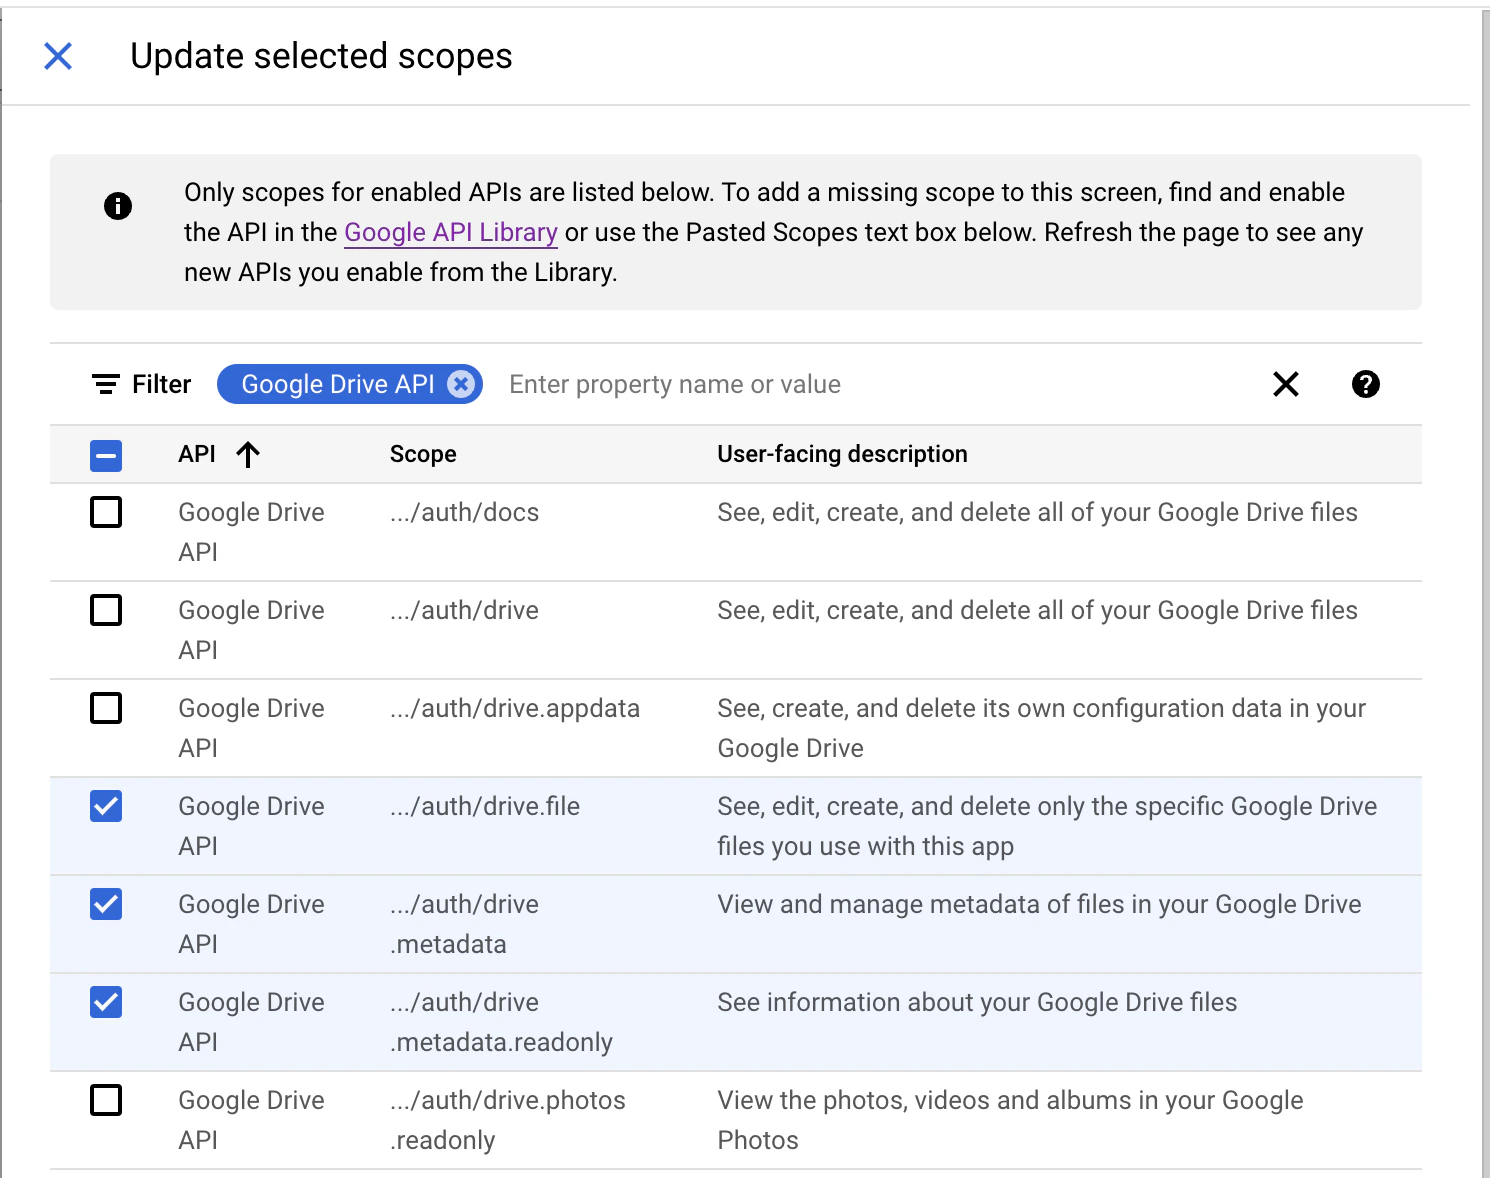
 3. On the Scopes page, click "Add or Remove Scopes", and then select the scopes that your integration will need. For example, if you are integrating with Google Drive, type "Google Drive" into the search box and select the scopes you will need. If the scopes you require are not popping up, ensure that you've enabled the appropriate APIs (previous step), and then refresh the page.
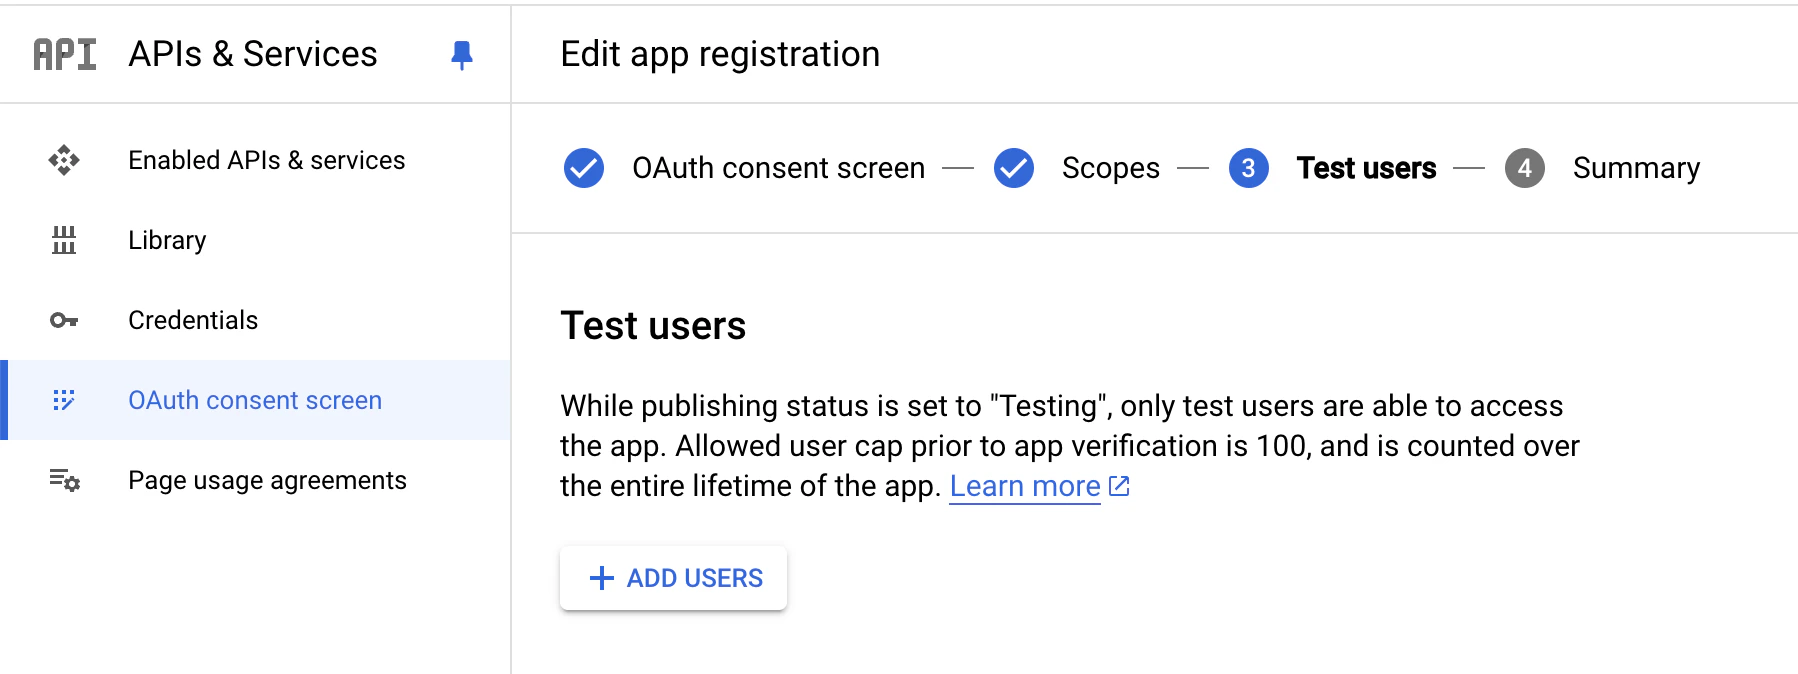
 4. On the Test Users page, click "+ Add Users" to add up to 100 email addresses, and then click "Save and Continue".
 ### Creating Client ID and Client Secret
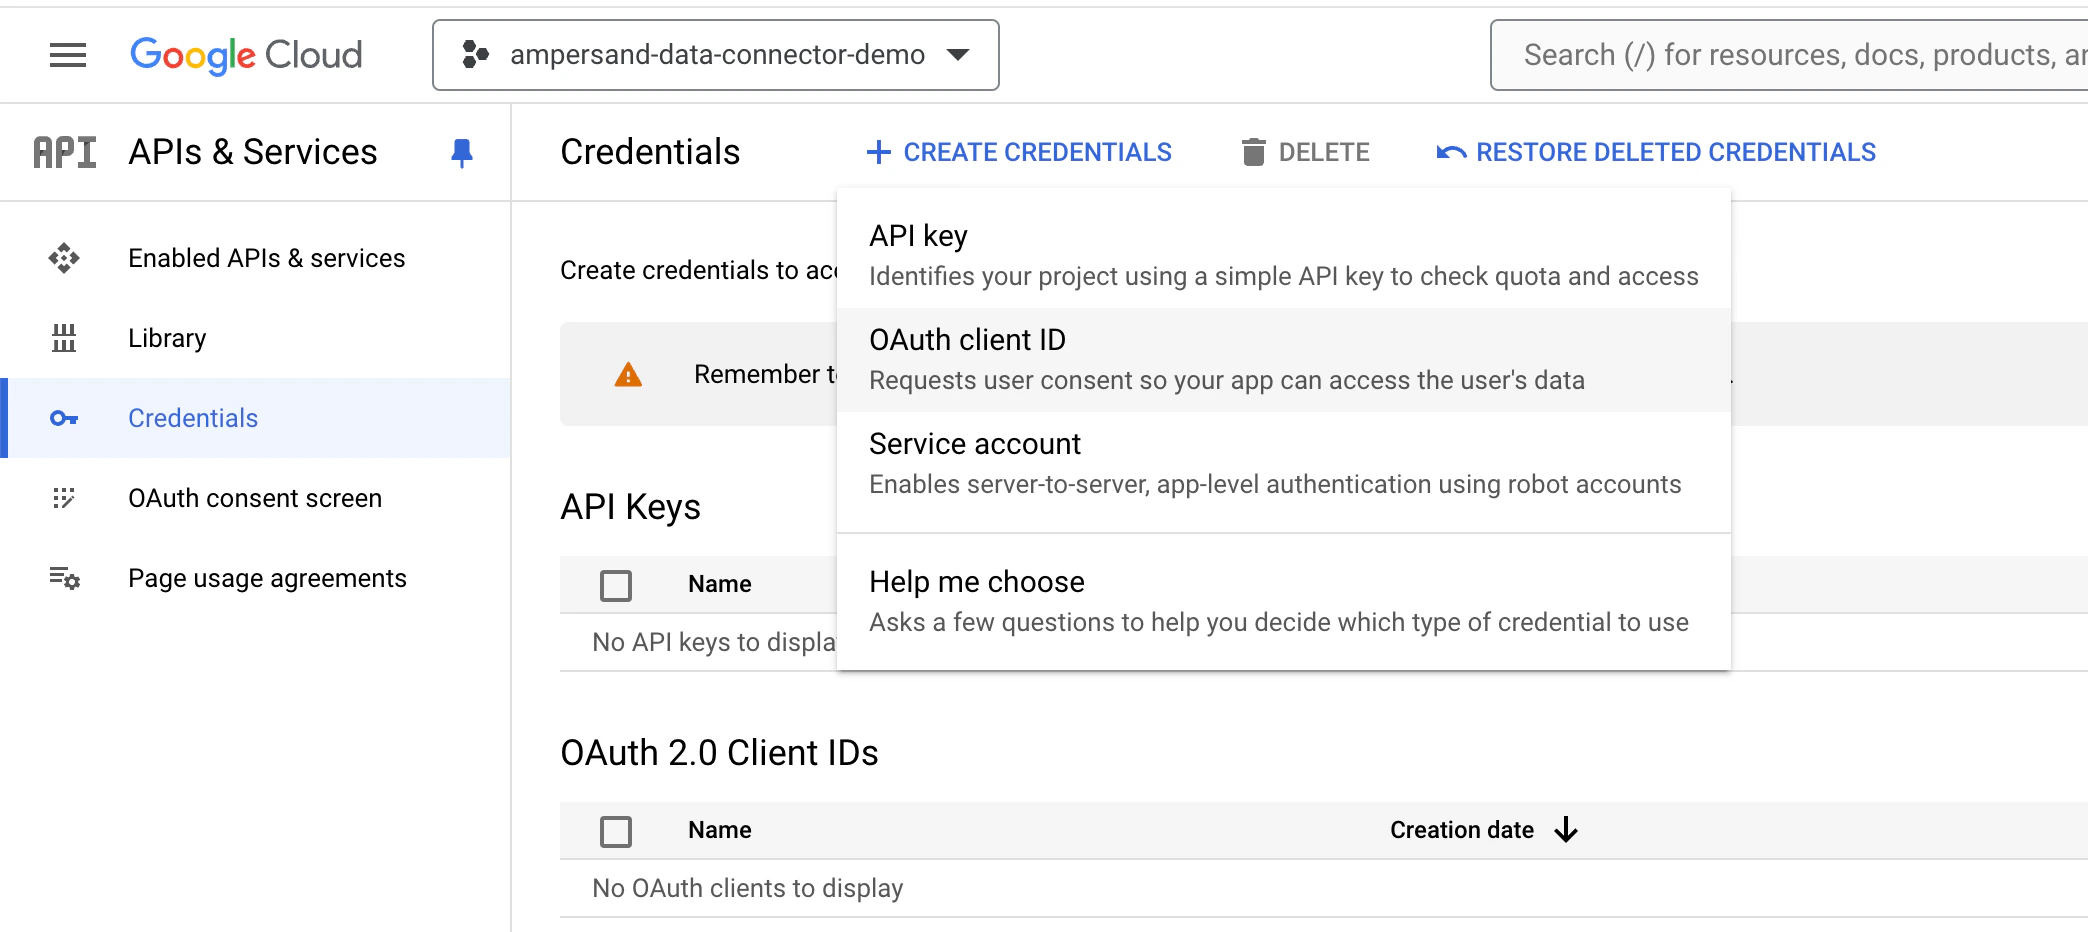
1. Once your Google App has been created, go to the [Credentials page](https://console.cloud.google.com/apis/credentials) of Google Cloud Console. Click on "Create Credentials" and then select "OAuth Client ID".
### Creating Client ID and Client Secret
1. Once your Google App has been created, go to the [Credentials page](https://console.cloud.google.com/apis/credentials) of Google Cloud Console. Click on "Create Credentials" and then select "OAuth Client ID".
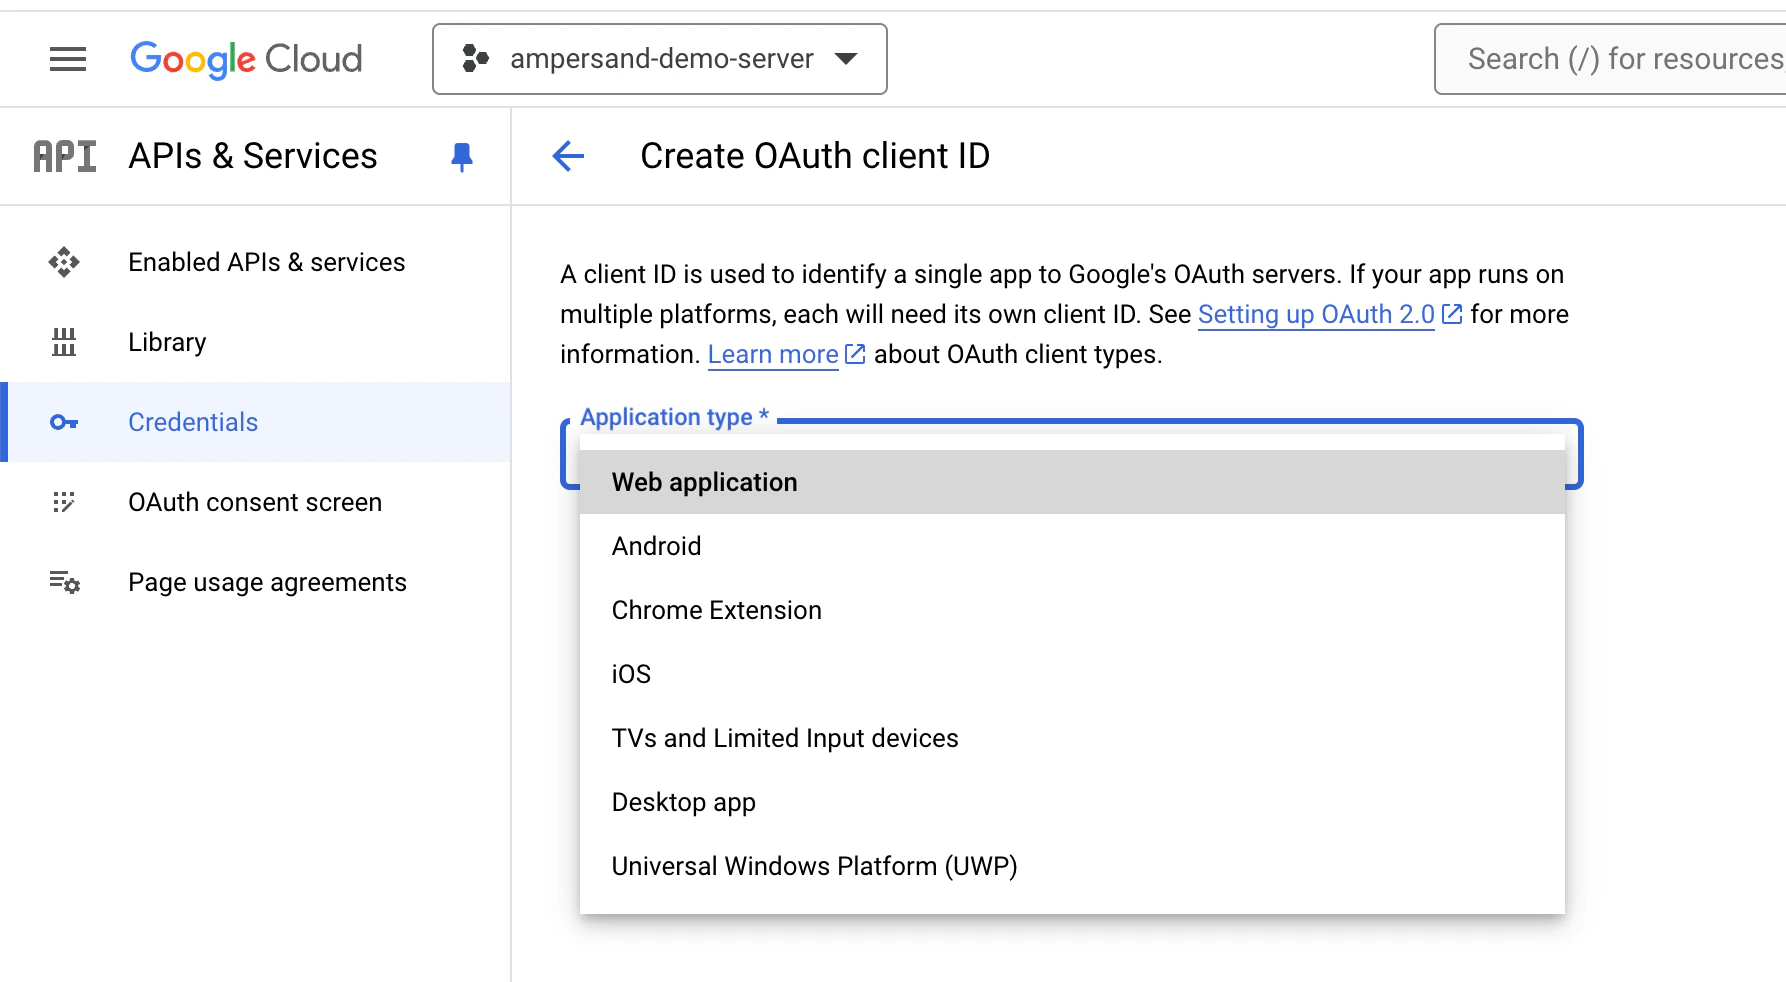
 2. Click "Web Application" from the Application Type dropdown menu.
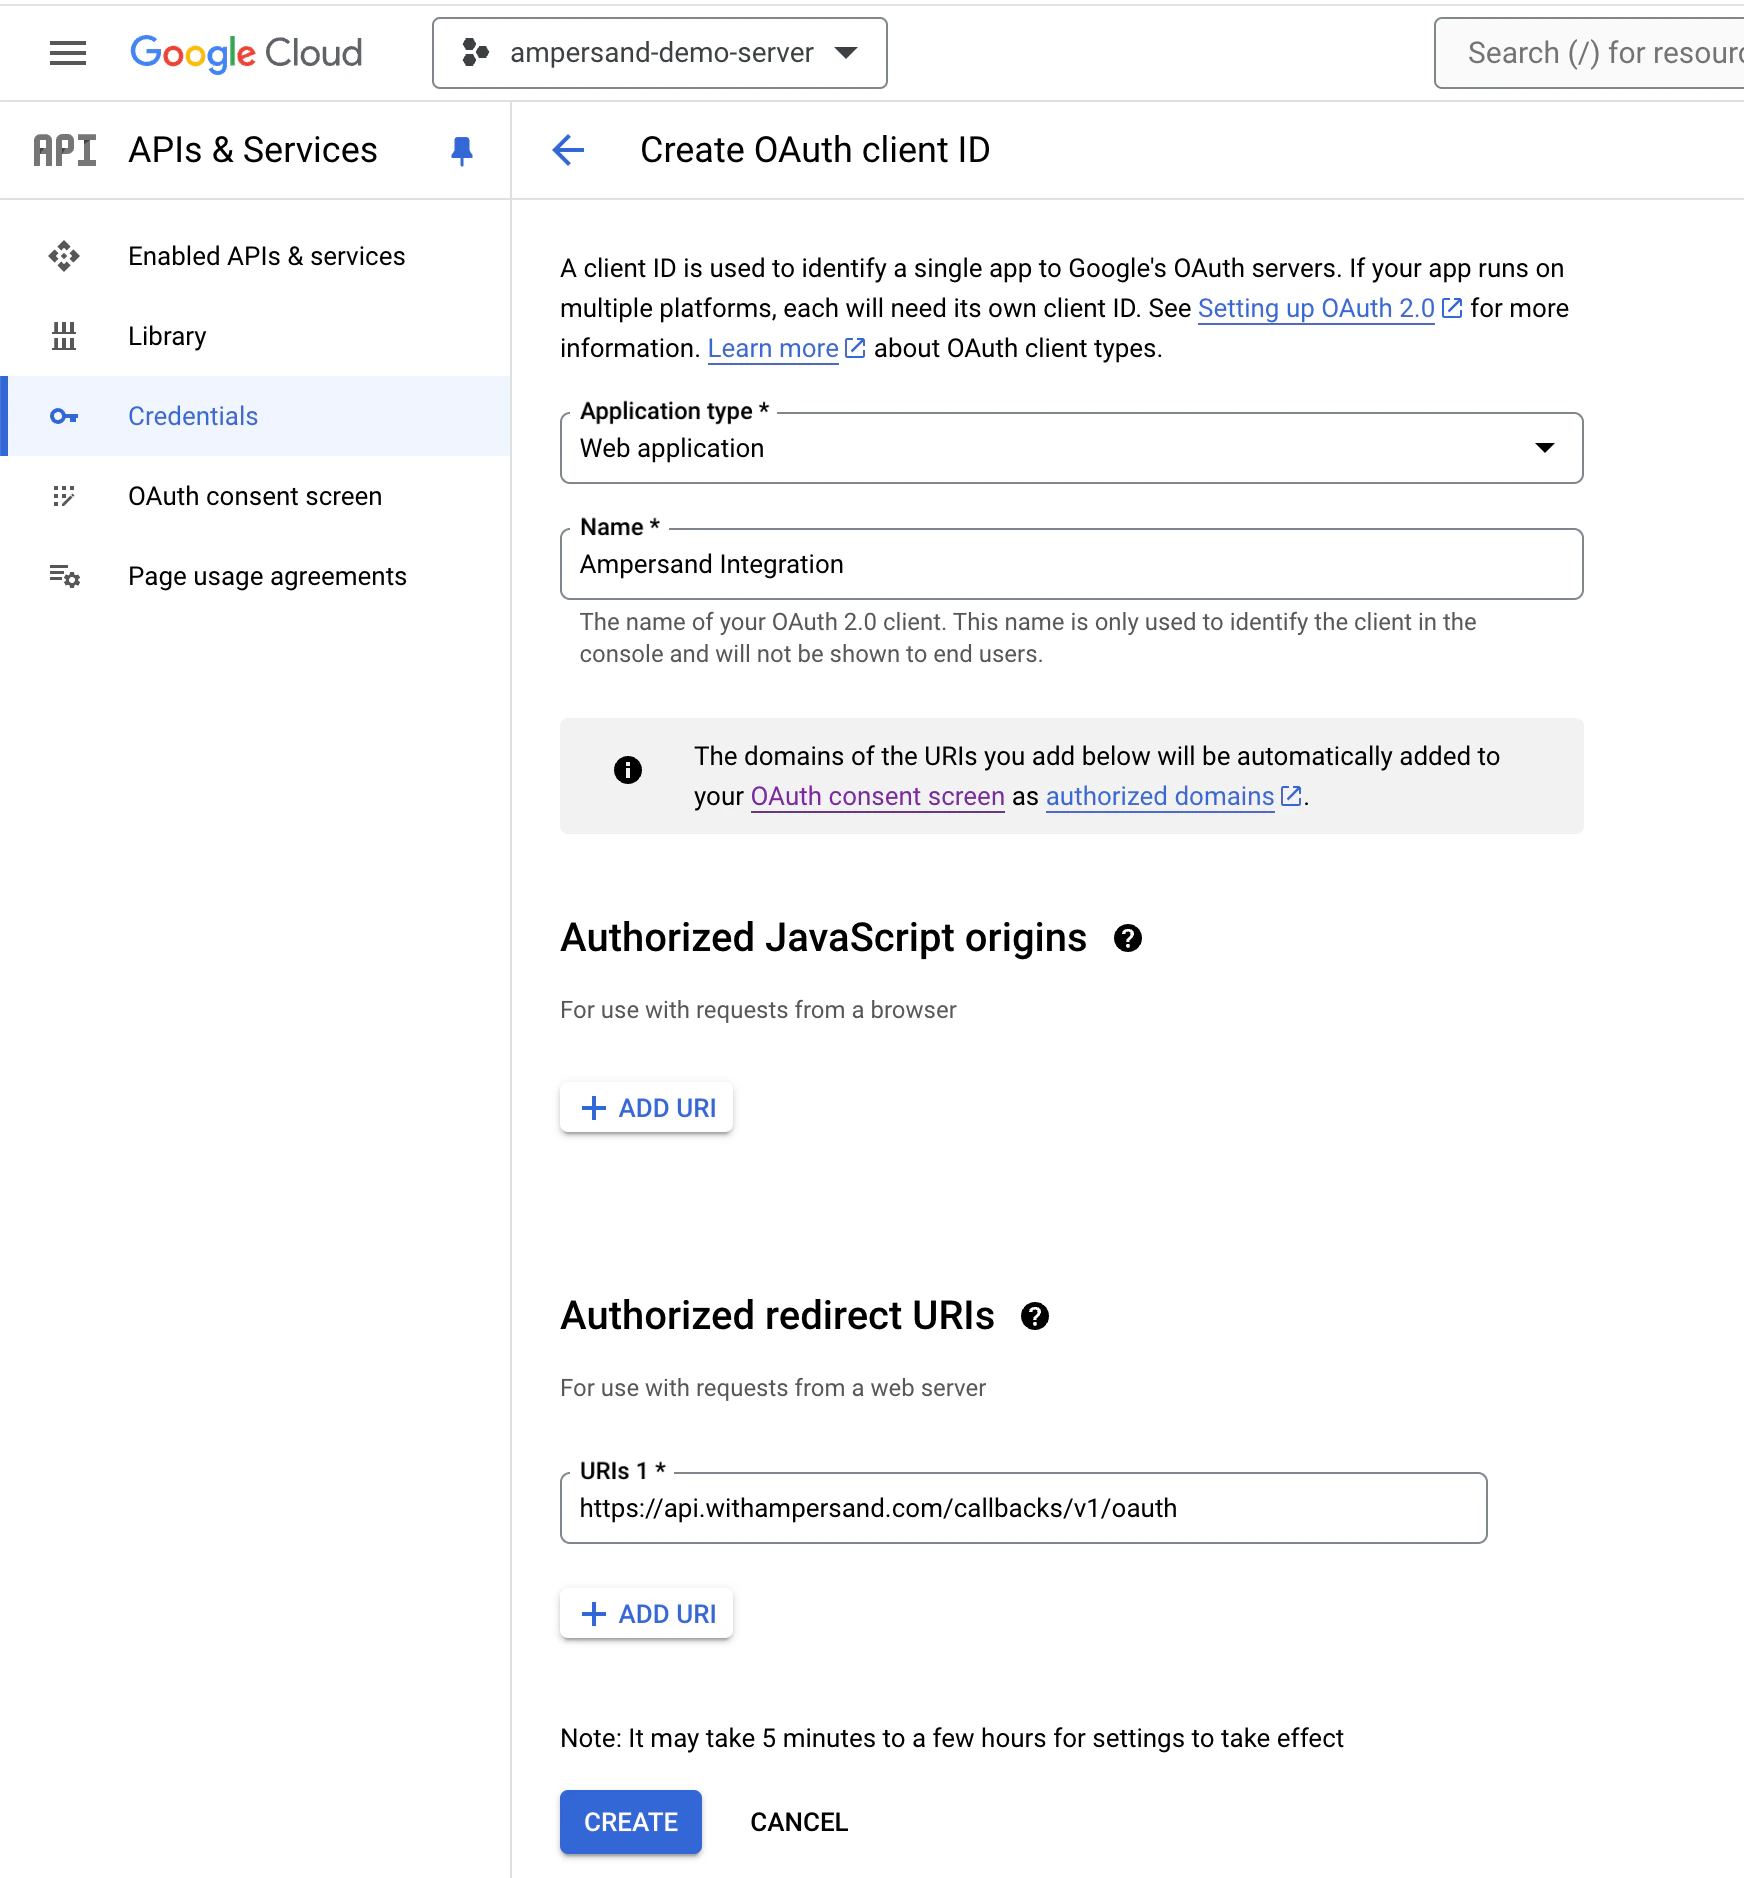
 3. In the name box, write down a descriptive name like "Ampersand Integration". Under "Authorized redirect URIs", add `https://api.withampersand.com/callbacks/v1/oauth`. Click "Create".
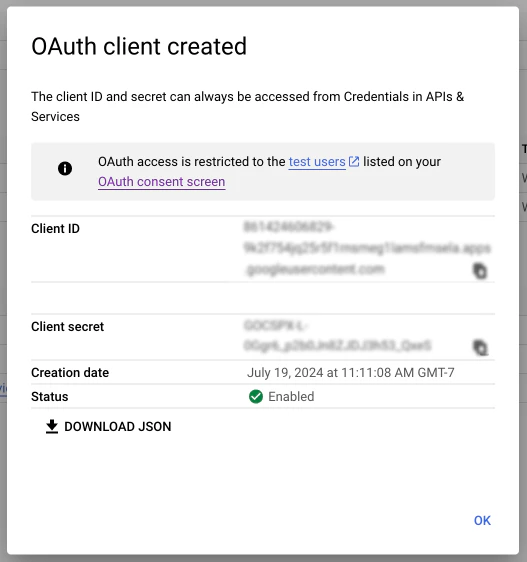
 4. There will be a popup which displays the Client ID and Client Secret, you'll need to add these to the Ampersand Dashboard in the next step. You can either copy and paste these values, or click "Download JSON".
 ## Add Your Google App info to Ampersand
1. Log in to your [Ampersand Dashboard](https://dashboard.withampersand.com).
2. Select the project where you want to create a Google integration.
## Add Your Google App info to Ampersand
1. Log in to your [Ampersand Dashboard](https://dashboard.withampersand.com).
2. Select the project where you want to create a Google integration.
 3. Select **Provider apps**.
4. Select *Google* from the **Provider** list.
5. Enter the previously obtained *Client ID* in the **Client ID** field and the *Client Secret* in the **Client Secret** field. In the **Scopes** field, enter each of your scopes on a separate line, and prefix each scope with `https://www.googleapis.com/auth`.
3. Select **Provider apps**.
4. Select *Google* from the **Provider** list.
5. Enter the previously obtained *Client ID* in the **Client ID** field and the *Client Secret* in the **Client Secret** field. In the **Scopes** field, enter each of your scopes on a separate line, and prefix each scope with `https://www.googleapis.com/auth`.
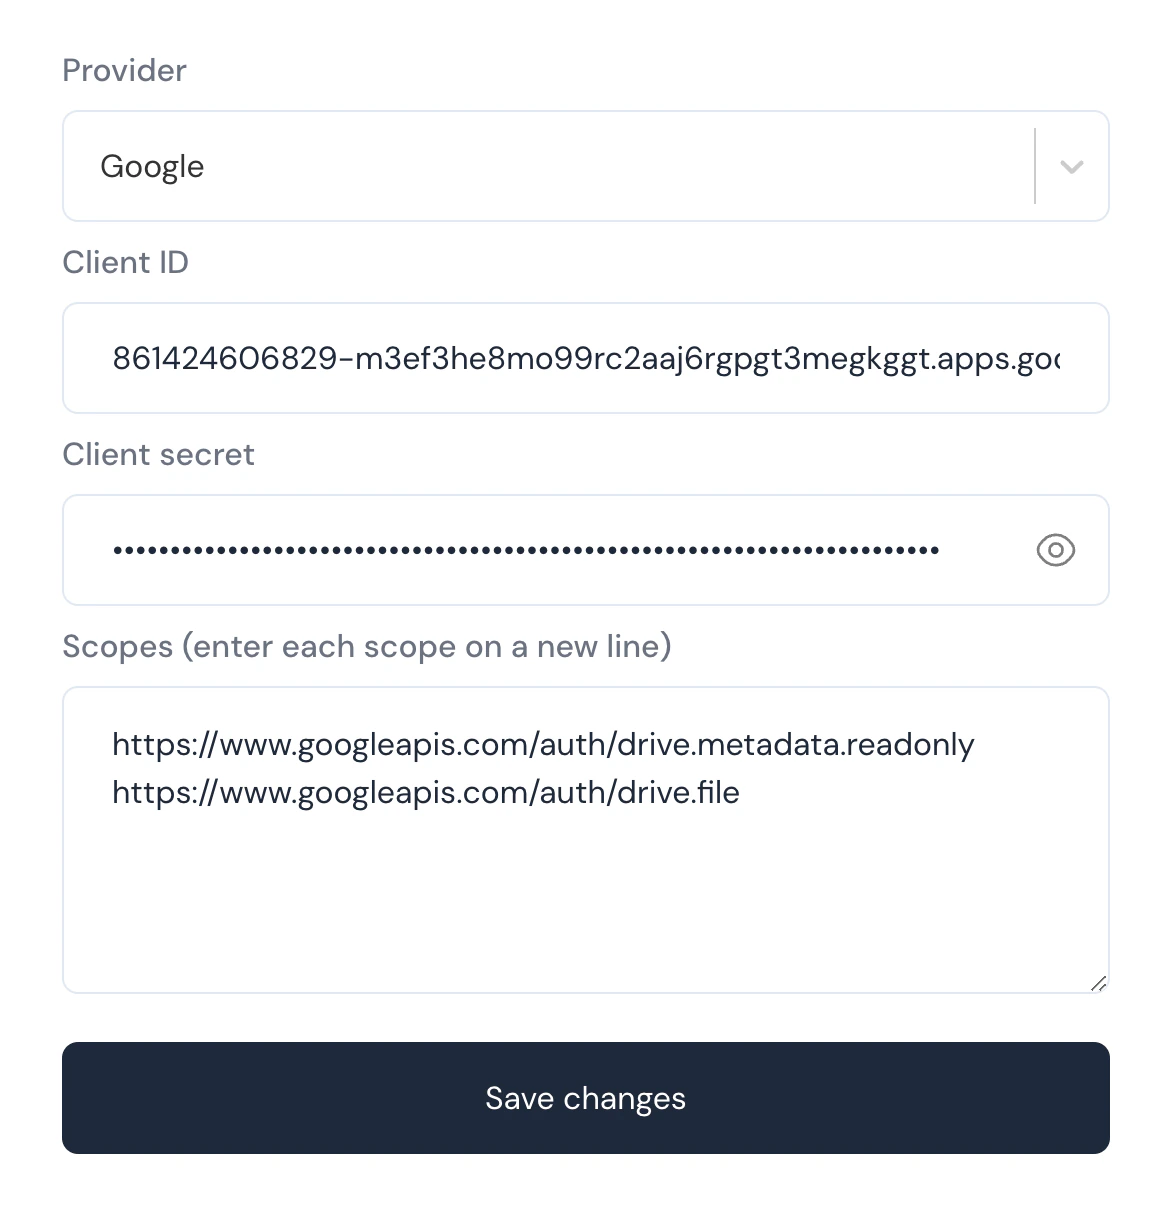 6. Click **Save changes**.
## Ship your integration to production
When you are ready to use your integration with external customers, you'll need to go through the Google App verification process.
1. Go back to the [OAuth consent screen](https://console.cloud.google.com/apis/credentials/consent) page, click on "Edit App" to upload a logo and fill out all the form fields (such as Privacy Page, Terms of Service).
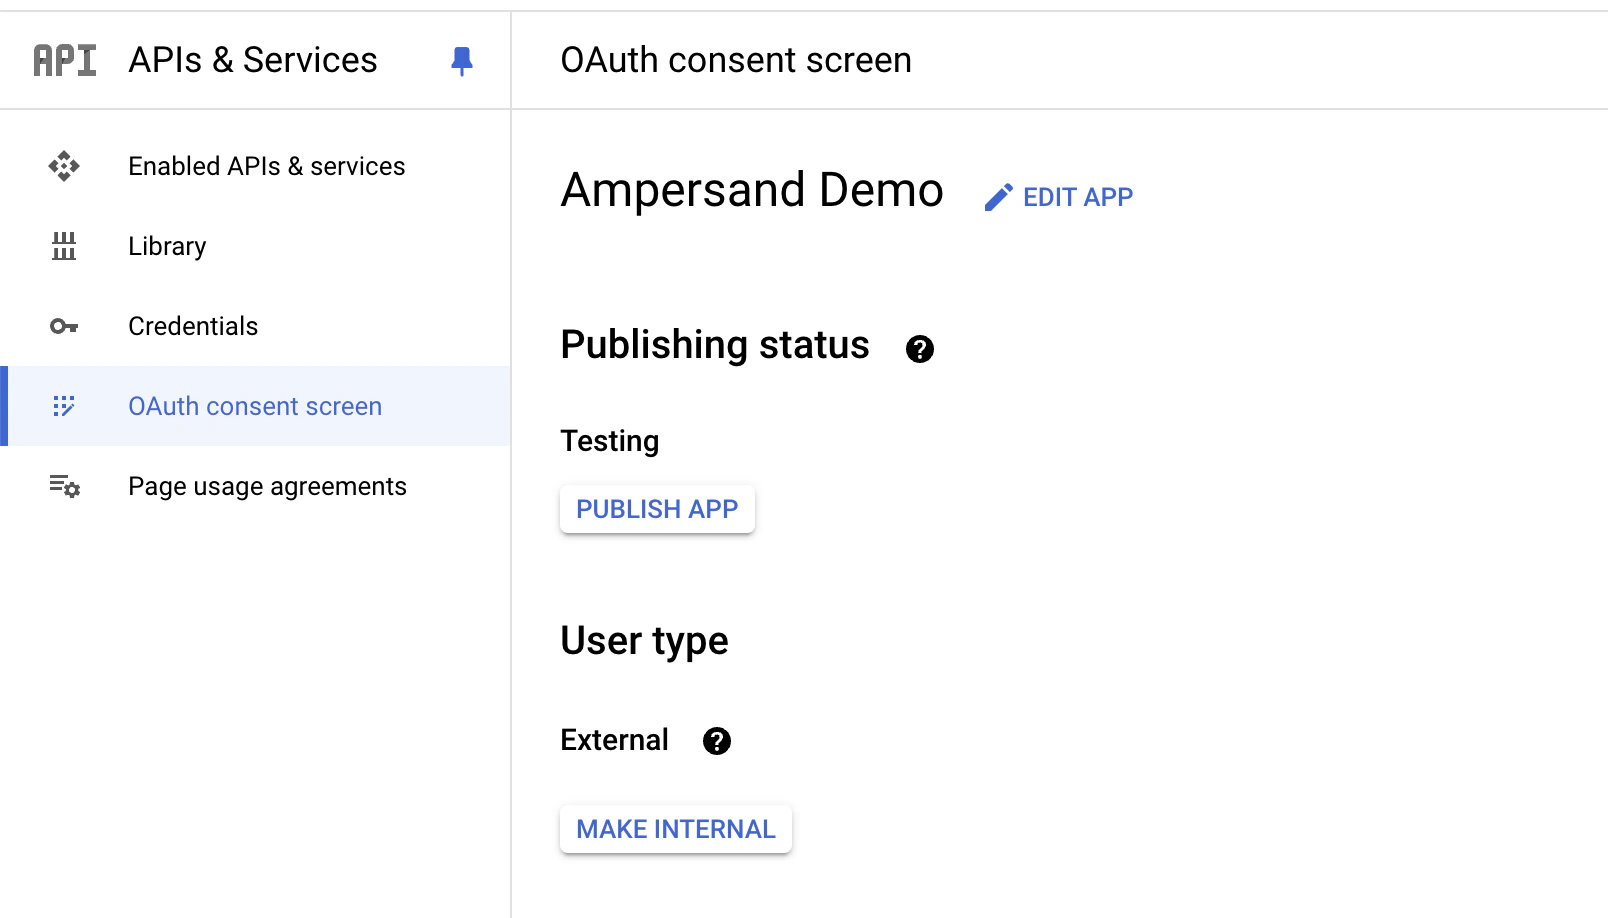
2. After saving your changes, click on the "Publish App" button under "Publishing Status".
6. Click **Save changes**.
## Ship your integration to production
When you are ready to use your integration with external customers, you'll need to go through the Google App verification process.
1. Go back to the [OAuth consent screen](https://console.cloud.google.com/apis/credentials/consent) page, click on "Edit App" to upload a logo and fill out all the form fields (such as Privacy Page, Terms of Service).
2. After saving your changes, click on the "Publish App" button under "Publishing Status".
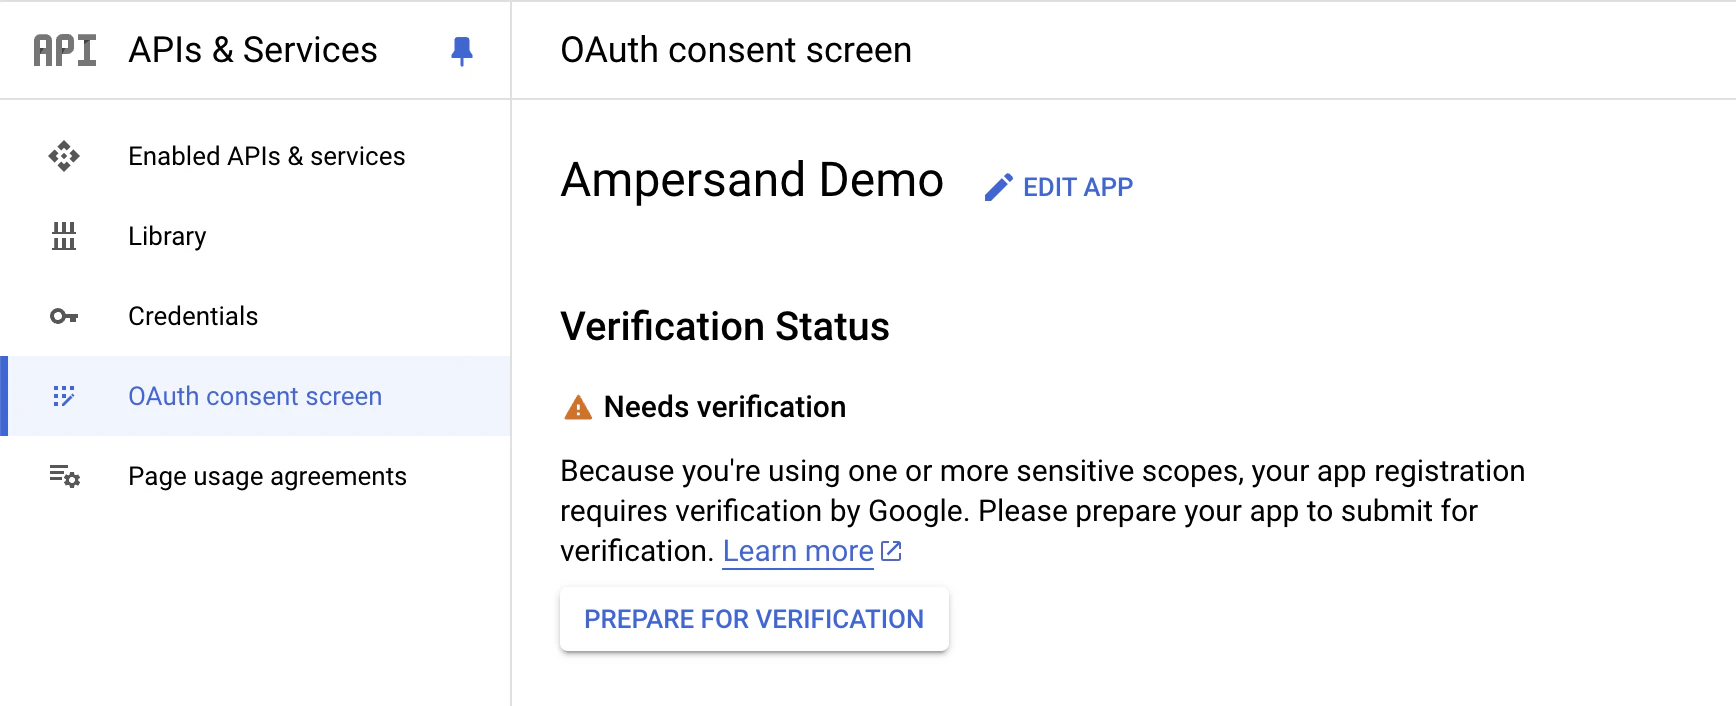
 3. Then click on the "Prepare for Verification" button that should now be visible, follow the instructions on the screen.
 For more information about the Google verification process, see [Google Support docs](https://support.google.com/cloud/answer/13463073?sjid=12970809243513943038-NC)